RowShare tables can be created from our catalog, from a blank page or by importing Excel spreadsheets.
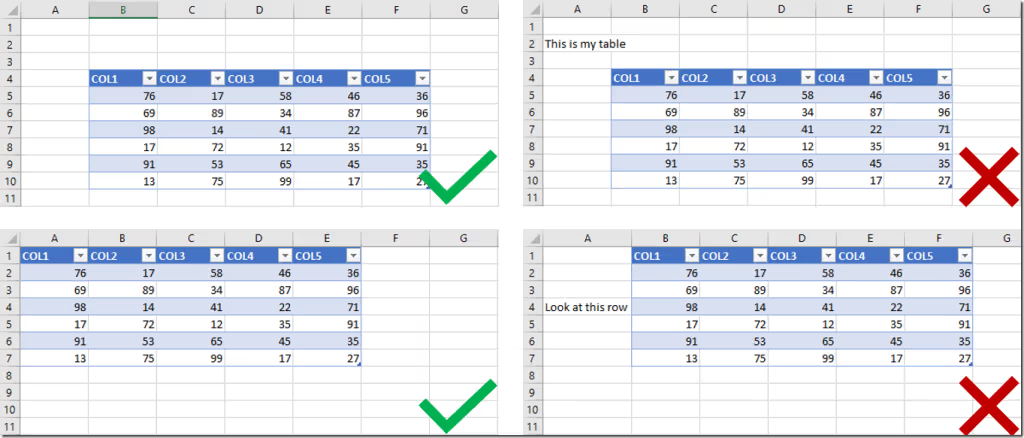
If you import an Excel file, you will get a RowShare table for each tab of your Excel file. Your Excel tabs should only contain well formatted tables, no additional information around your table. Merged cells are not supported either.

By default, after an import, all your columns will be Text columns in RowShare. It means you will not benefit of RowShare data type features such as date validator, checkboxes, drop down lists… And if your Excel file contains pictures, they will be dropped by the import process.
Typically, you would go through each column of the table and specify the type of data it contains. However, in some cases, such as when you're importing numerous similar files or if they contain images, it might be more useful to automate the process.
Advanced import process
This is useful if you want the imported table to have the right type of columns created and optionally import pictures as well.
Start from your clean existing Excel file and follow these steps:
- Add a new tab, name it “RowShare_metadata”. (Capitalization matters)
- In this tab, create two columns named Name and Value
- For each column of your Excel file that you want to specify instructions for, add in this new tab a row containing:
- Name: the name of the column to treat specifically, followed by “:Type”,
- Value: the data type that you want RowShare to use to import this column, amongst the following list:
- Blob : pictures
- Boolean: Booleans (True/False)
- Number: Numbers
- Date: Dates
- DateTime: Date and Time
- Time: Time (hour)
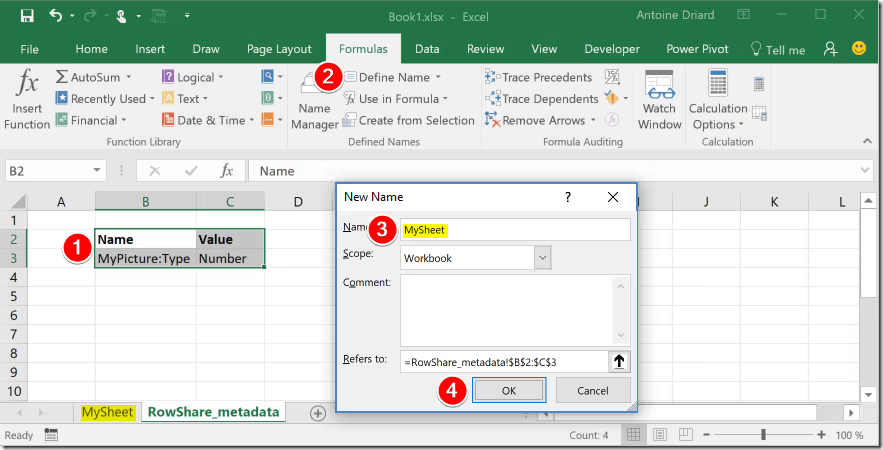
- For example, to specify that the MyPicture column contains a picture, add this row to your RowShare_metadata tab

Select your newly created row(s), and name them after the tab that contains your data to be imported (Excel tab Formulas / Define Name):

That’s it, your table is ready to be imported into RowShare.
Create a new table, choose the first option “From an Excel File”, and you’re done!


